Maryland hasn’t gotten edible chocolate and gummies yet, so the next best thing is to learn how to make your own edibles. You’ve heard of the CBD lounges and cafes in New York and Philadelphia. So how do you go about making your own? Don’t get scared off because we have the guidelines here.
We’ll cover:
- what infusion is
- important terms
- tools you must get to succeed
- a short lesson on how to activate cannabis for infusing butter or oil
You’ll get more resources you need to whip it up in the kitchen. And we’ll throw in our in-house RSO recipe from our team member Alex to get you started.
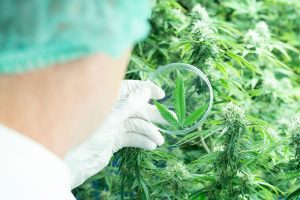
What is Infusion?
Infusion is the process of adding cannabinoids (and terpenes) into your desired food and drinks. It’s the heart of how to make edibles. Before we dive into the process of how to make your own infusions, let’s cover some key terms.
Important Terms
Cannabinoids: the chemical compounds in cannabis that interact with our endo cannabinoid system. They can provide a variety of medicinal effects. Cannabinoids include prominent ones like THC and CBD. There are also others like CBG and THCV gaining prominence.
Decarboxylation: also known as decarbing. This is activating cannabinoids and terpenes in your flower. Then you can use it for infusion.
Terpenes: the aromatic molecules in cannabis and many other plants and herbs. Examples include black pepper (beta-caryophyllene), mangos (myrcene) and lavender (linalool). They may provide more medicinal benefits. And it’s theorized that terpenes enhance effects when combined with cannabinoids.
Benefits & Precautions
There’s the good and the somewhat bad of this method of how to make edibles.
So let’s get the bad out of the way first. The “bad” are precautions to consider for infusion. Measuring the cannabinoids like THC can be difficult.
And digesting versus inhaling cannabis can produce more potent effects. So, regardless of experience level, “Start Low and Go Slow” with your consumption. Side effects can include anxiety, nausea and possible hallucinations.
So remember to test your canna oil or canna butter by the teaspoon to measure effects per serving. And also keep a CBD vape or tincture on hand to help ground you if the THC sends you for a loop.
Now onto the good stuff! Returning to digestion vs inhalation, you may seek medicine that lasts for a few hours, so eating is the way to go.
Though it can take up to 90 minutes for you to digest (depending on your metabolism), you get the help of longer effects and more relief from your symptoms.
Remember that consuming more doesn’t mean the effects will set in faster.
If you love cooking or baking, you get to include cannabis into your routines and hobbies. Plus, the discretion of infusing your food means you can get through your day easy. You won’t have to hide the smell of cannabis.
Not to mention that there’s no irritation to your lungs and esophagus from the heat of smoke. And you get to make your favorite foods into medicine that tastes good (give or take how much you used to make your base)!
Tools You’ll Need
Before we get into how to make edibles, let’s make sure you got everything you need.
Flower
Of course, you need cannabis flower to get started. But consider this before you hop on a bulk shake or ounce sale:
- What type of relief are you looking for?
- Which strain(s) provide that relief?
- What’s the THC percentage?
When starting out, we recommend that you use cheaper bulk purchases to experiment. At least until you’re comfortable with investing more into your process.
You can also use concentrate—all the same questions apply. Unless you buy RSO or distillate, you may still need to activate your wax or budder.
Do You Want an Oil or Butter Base?
This can come down to preference or what your aim is. If you’re looking for the healthiest option, experts recommend creating canna oil with a coconut oil base. THC binds well to fat (coconut oil has plenty) and the oil can also offer major health benefits. Other options are olive, walnut and avocado oil.
Kitchen Utensils
If you don’t have a specialized appliance for decarbing, you’ll need a few more things. Start with a large pot which you must clean your flower (more on that below). With clean buds, you’ll need an oven and baking sheet to decarb.
Once you’ve activated your cannabinoids, you’ll want a Crockpot or French press coffeemaker for the oil or butter infusion process. Last, you’ll need a container for your excess or if you’re creating the oil/butter in advance for another edible-cooking day.
Cannabis Cooking Appliances
If you want to skip the headache of decarbing on your own, there’s a few options. There’s the LEVO machine which is great for creating canna oil.
Then there’s the NOVA appliance which decarbs and infuses your oil or butter. You may have also heard of the Magical Butter machine, which is also an option.
How to Infuse
Now let’s get down to the actual infusion process! You have all the tools you need to get started and if you love being in the kitchen, expect spending some time there.
Low temperatures and patience will more than likely yield the optimal results you’d like.
Clean
If you’re using flower, you’ll want to clean it of any unwanted residue and contaminants. Get a large pot of water on the stove and get it to a rolling boil.
Have a bowl of ice water nearby for your bud. Add your dry flower and let it boil for about 5 minutes. We promise your cannabinoids and terpenes won’t boil away!
You may notice a thin film develops on the surface after you cut the flame. Use a spoon to scoop it off, dump out the water (NOT your flower), and then submerge your cleaned buds into the bowl of ice water.
Remove and then lay your flower out to dry.
Decarboxylate
Now to decarboxylate! If you’re using THC-dominant cannabis, set the oven to 250F. For CBD-rich strains, set it to 295F.
Lower temperatures preserve as much terpenes and cannabinoids as possible. They’ll degrade because of the heating involved.
Once your oven is hot and your buds are dry, place them onto the baking sheet and let them set in the oven for 30-60 minutes.
When the time is up, congratulations! You’ve decarbed your medicine and you’re ready to infuse your oil. Now start making tasty meals, snacks and/or drinks. More on those details here.
Alex’s RSO Recipe
Here’s our internal recipe that you can try out. If you’re looking for how to make edibles in an easier way, this is it!
Tools You’ll Need:
- cannabis (amount is up to you)
- mason jar
- Everclear or ethanol alcohol
- mesh strainer
- pot for hot water
Instructions
- Get your favorite strain of cannabis
- Grind it coarsely
- Decarboxylate at 220F for 20 minutes
- Fill mason jar with decarbbed cannabis, and then pour Everclear/ethanol into the jar. Stop once alcohol is a half-inch above bud
- Seal mason jar with lid
- Let your concoction set in a dark, cool place for 2-6 weeks
- After the wait, strain the bud out
- Evaporate alcohol by placing the jar in hot water (no heat underneath) for a few hours with no lid on
- Allow to evaporate until you’ve attained the desired amount and consistency of RSO
Takeaways
Now you can get started with creating your own canna oil, canna butter and/or RSO. Remember to test the dosage with 1 teaspoon for potency and to take notes on your experiments.
Learning how to make edibles is a fun process, especially with the proper guidance and tools. We’ll let you know when we’ll have cannabis cooking appliances in our dispensary.
Let us know what kinds of goods you’ll be making.